

RV Queen to RV King Modification in our ORV 21DBS *updated
I disliked the RV queen size (60”x80”) and lack of comfort that came stock with our 2019 Outdoors RV 21’ DBS Travel Trailer. My husband can sleep anywhere no matter the comfort part of the whole FishnSleep thing. I wanted a larger and more comfortable bed. I had to figure out how to get a bigger bed in the space and allow for the slide in to operate. We purchased the mattress, but the other parts were from things around the garage and house. Not an elegant build but functional and works just fine for us.
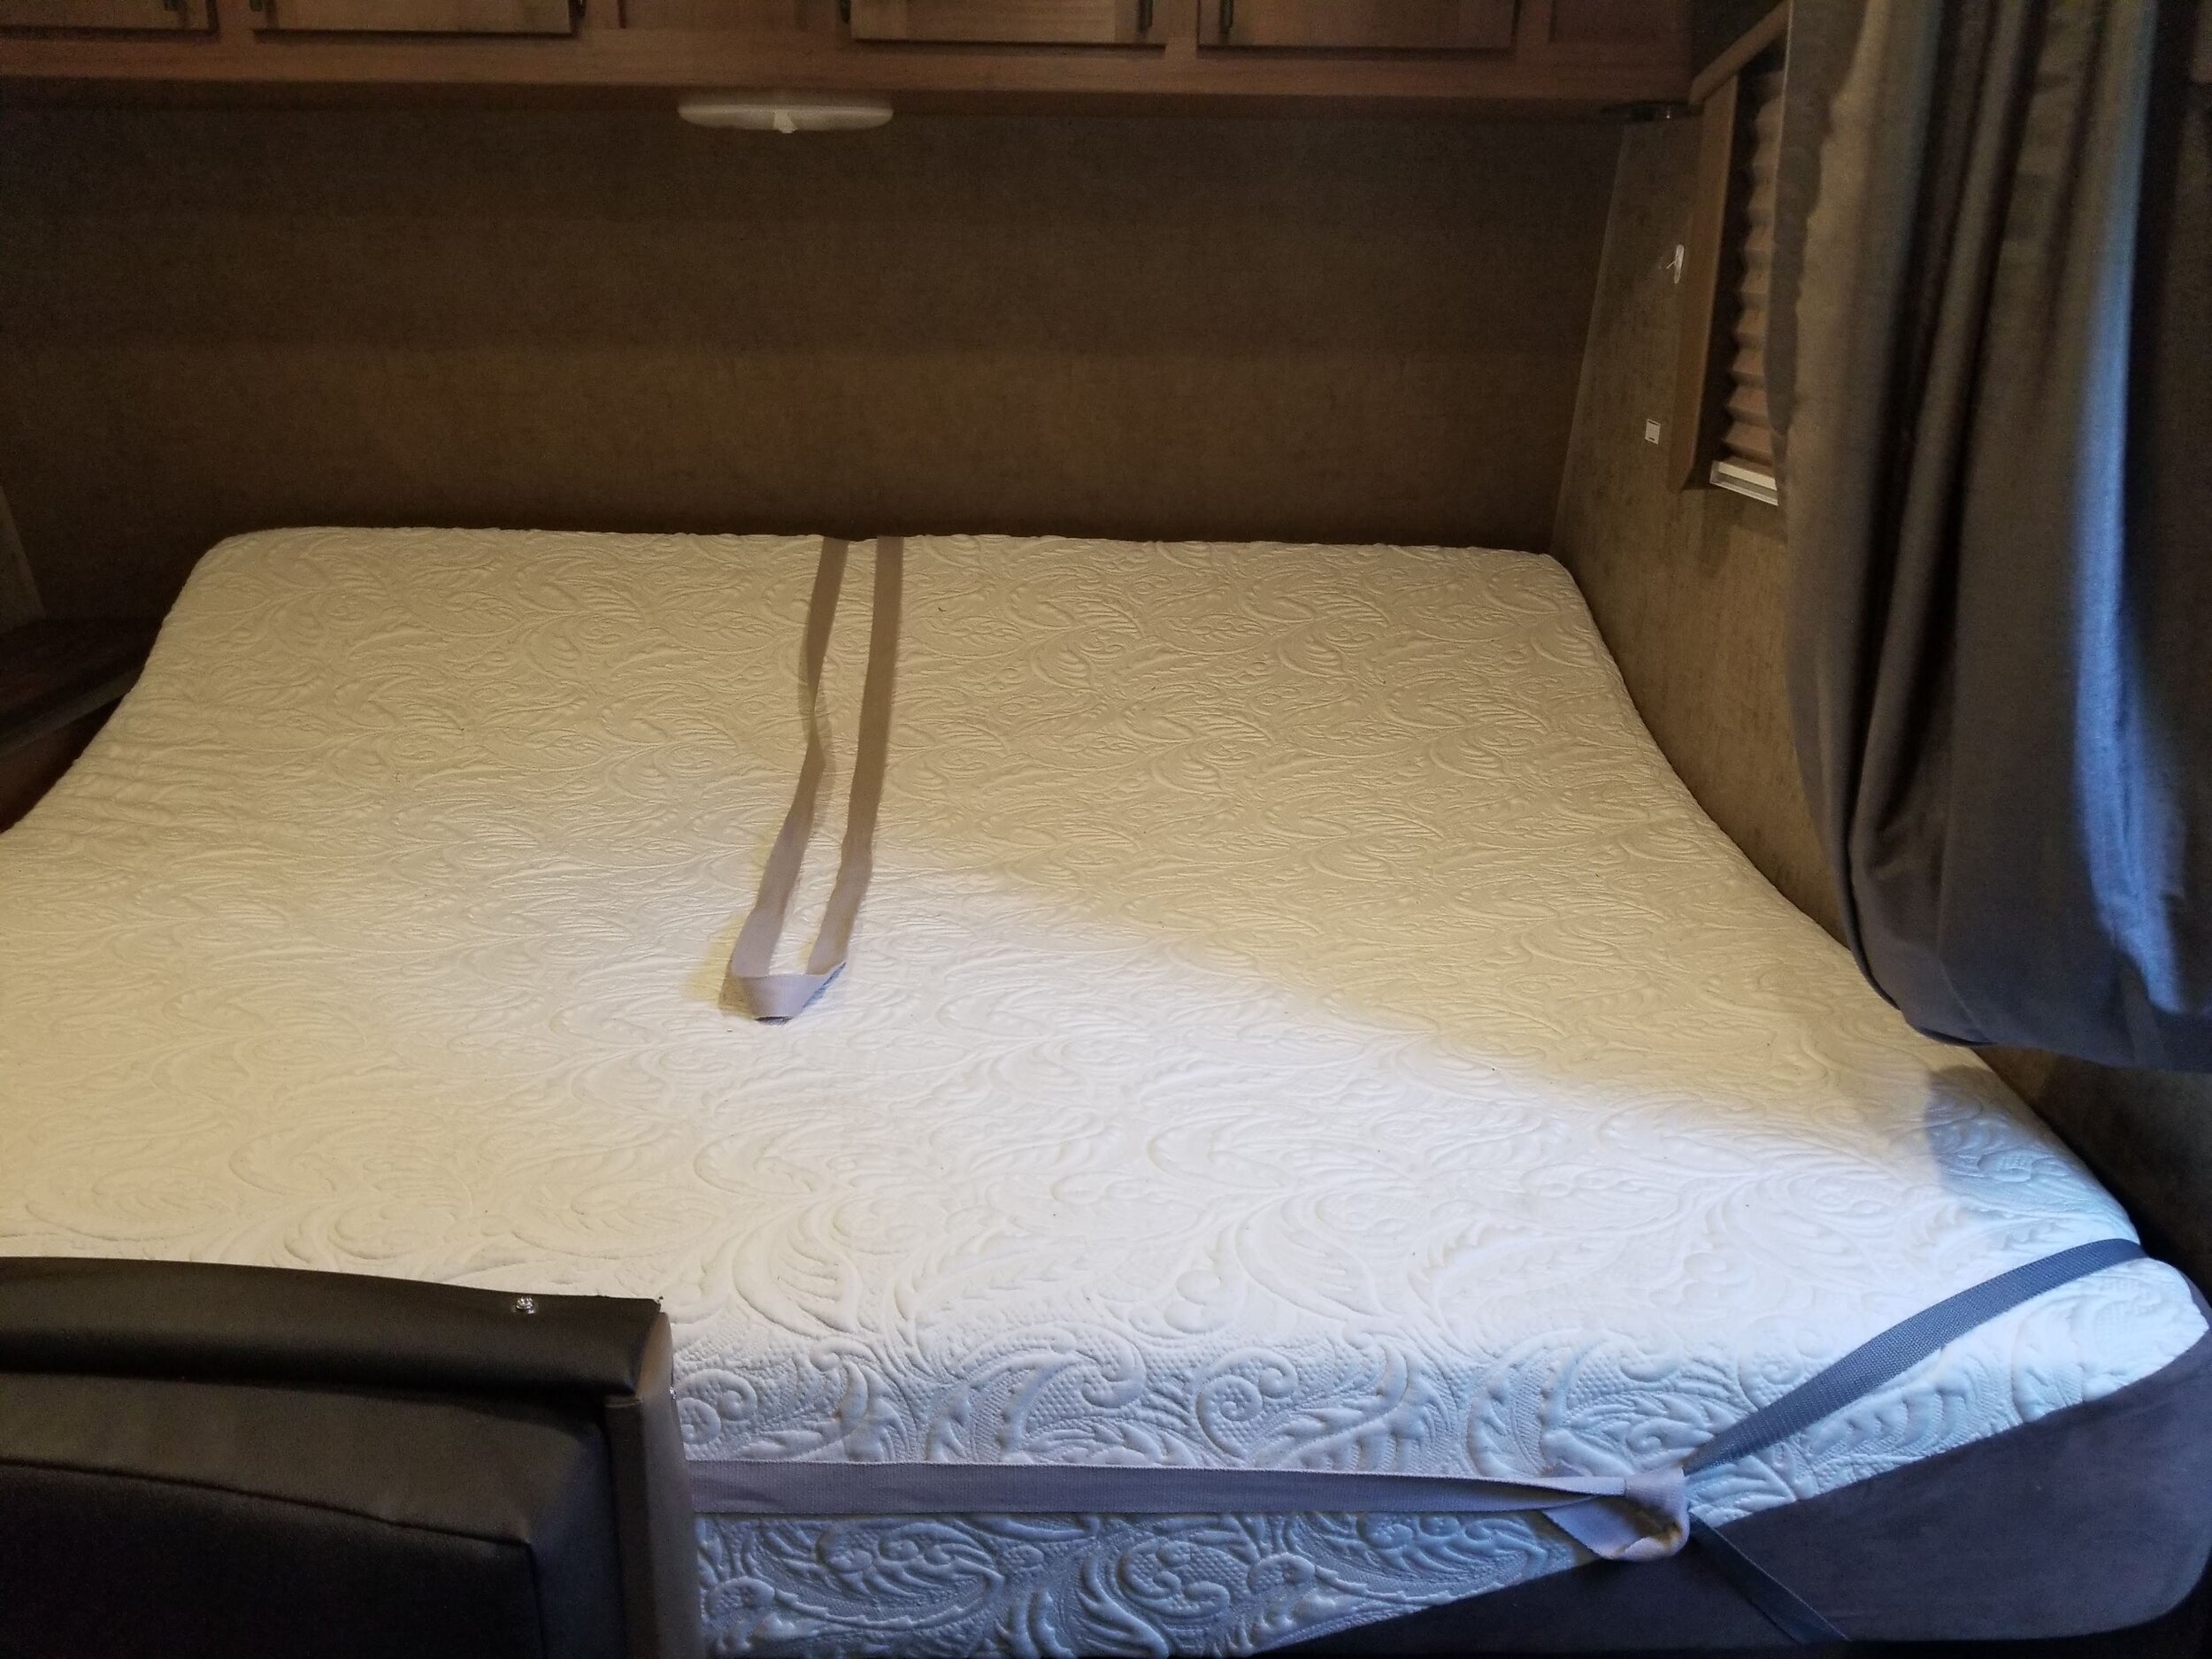
This bed has two positions I refer to these as “sleep position” or fully flat, with the slide out and “day/transport position” when in this mode it is a nice lounge area for reading and watching TV. Our mattress/sleeping area dimensions are 80" wide Window to Window and 77" total Length (72" mattress + 5" Ledge) Front of RV to end of bed.
What I used for our modification:
RV King Size Mattress 72x80 - We purchased a memory foam Dynasty Cooling RV King 72”x80” and 10" thick (picked this height to match the small 5” wide ledge height at the front of the trailer) I shopped around but at the time we purchased Amazon had the best price, they have increased in price since our purchase. This mattress is more comfortable than the memory foam we have at our home. It has just the right amount of firm /soft for us.
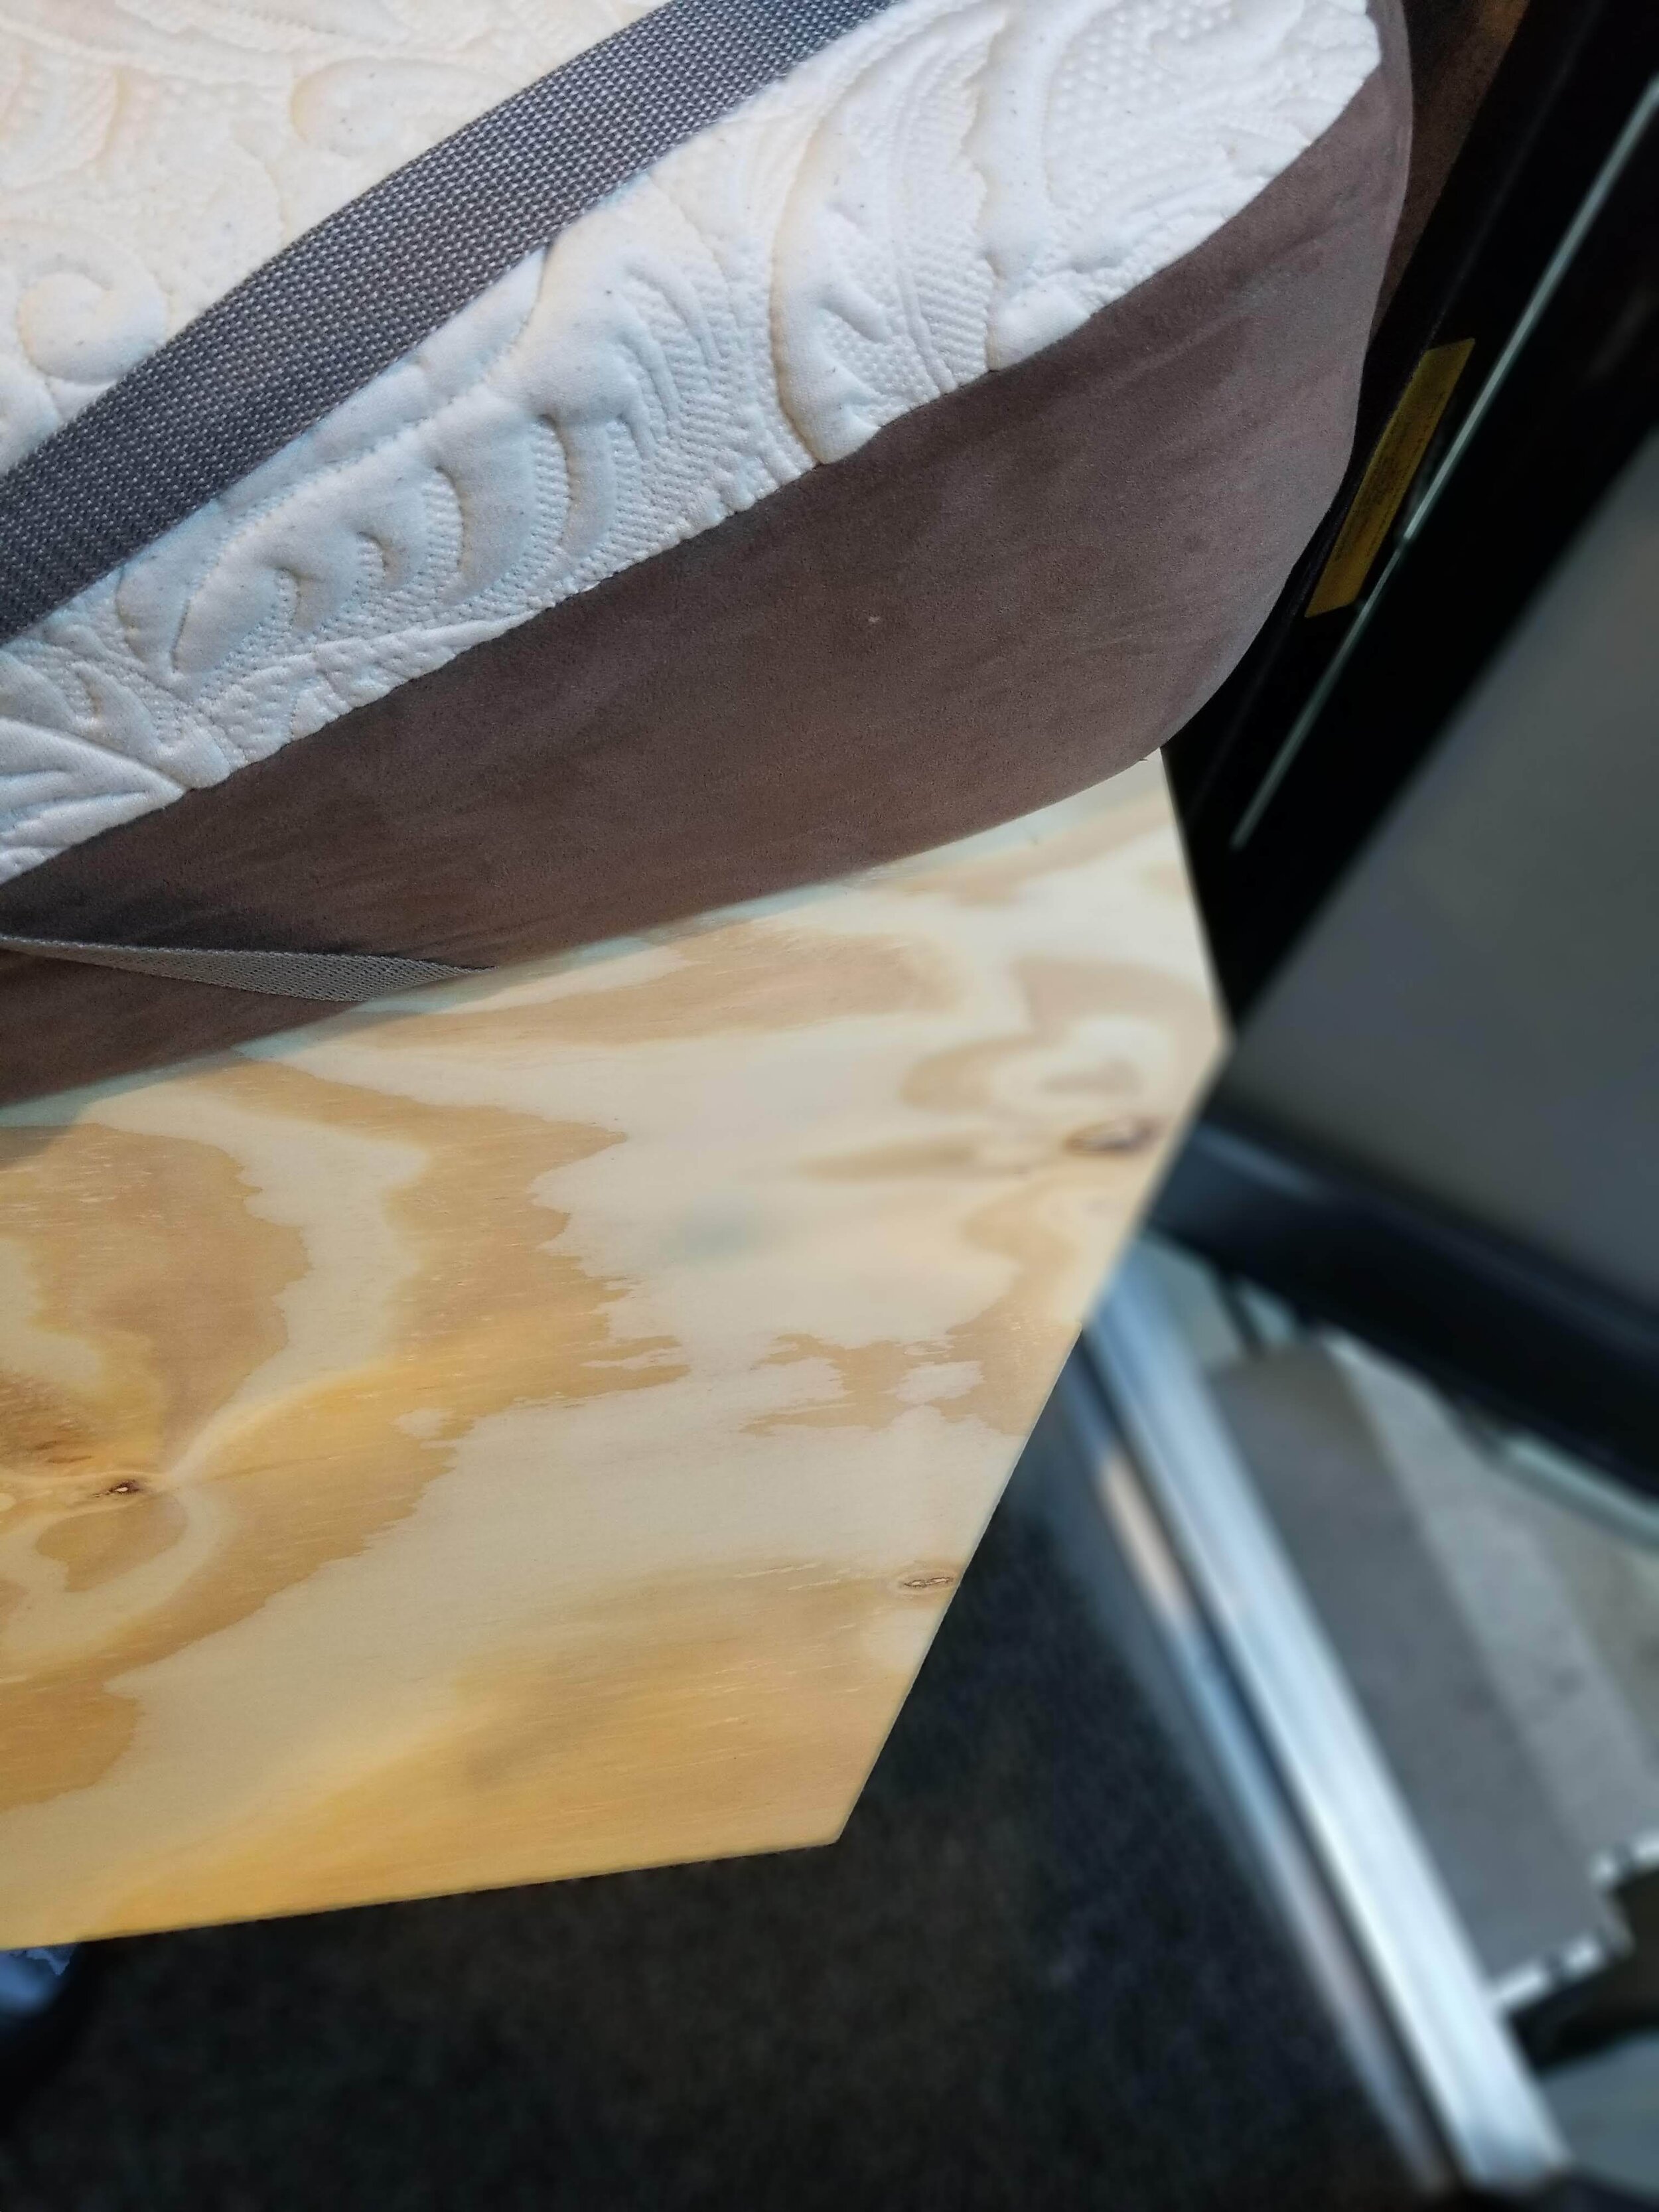
1/2 thick plywood 60"x21" with the corner by the door cut at an angle see picture below
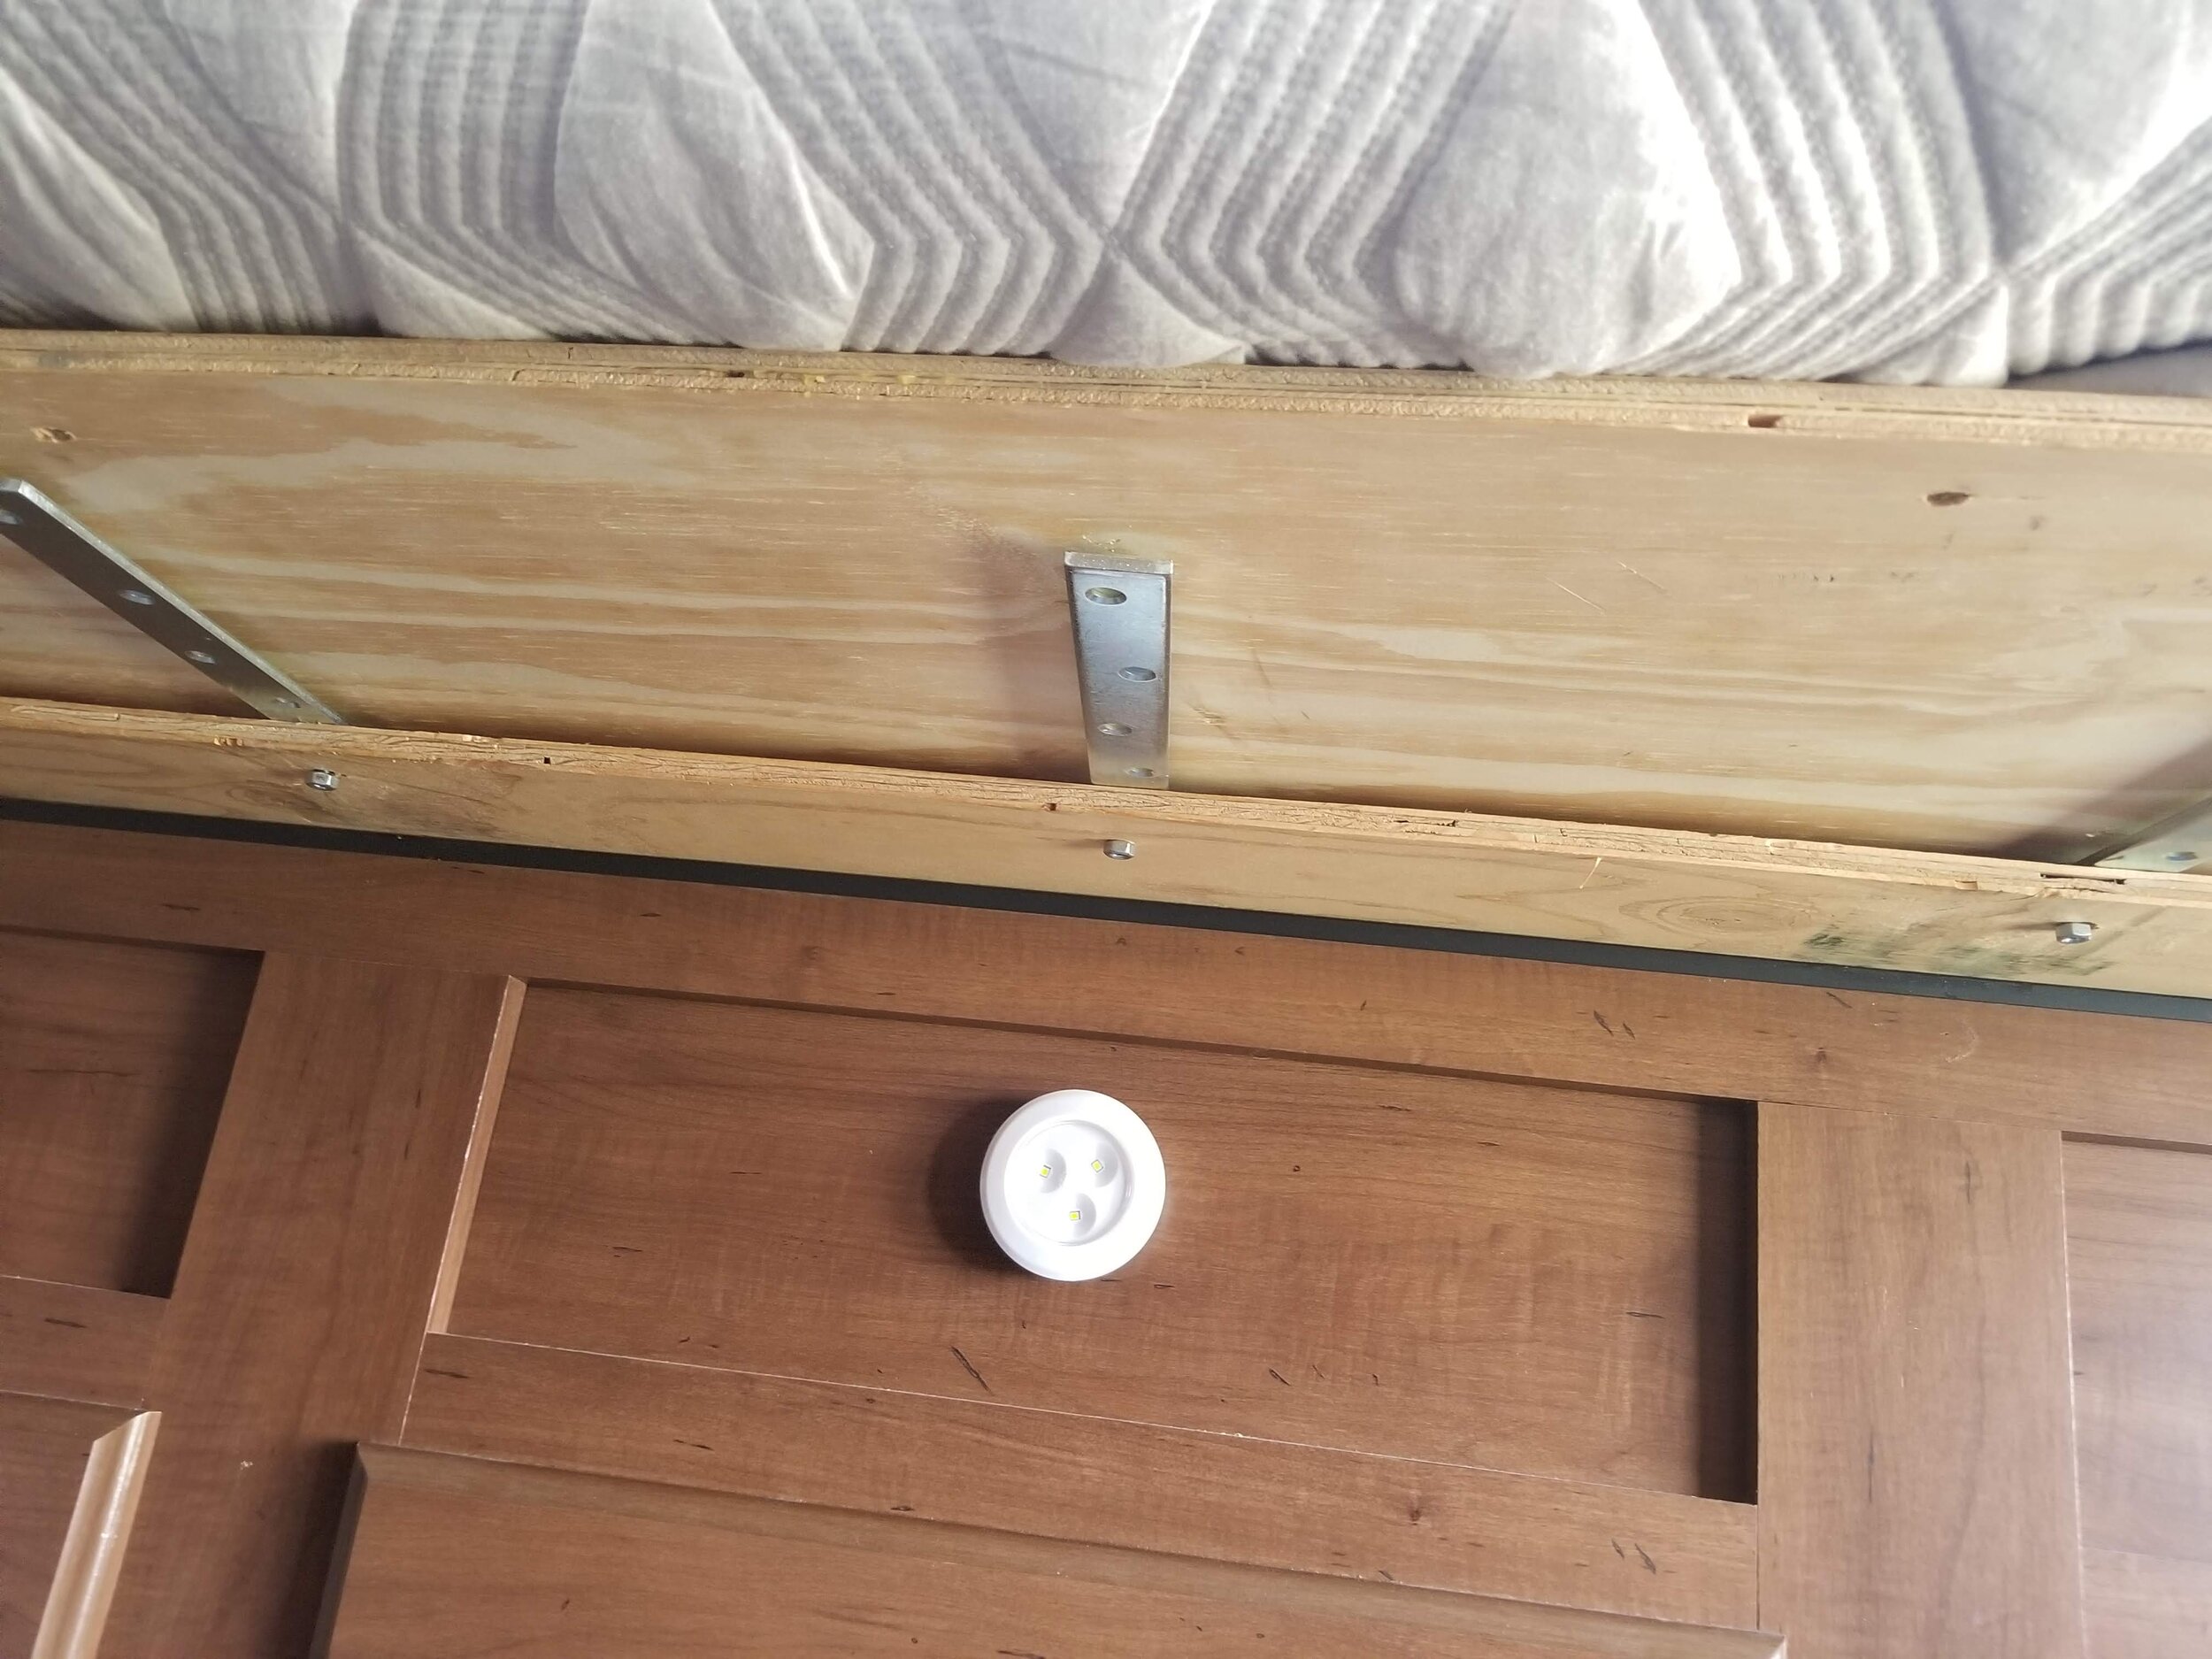
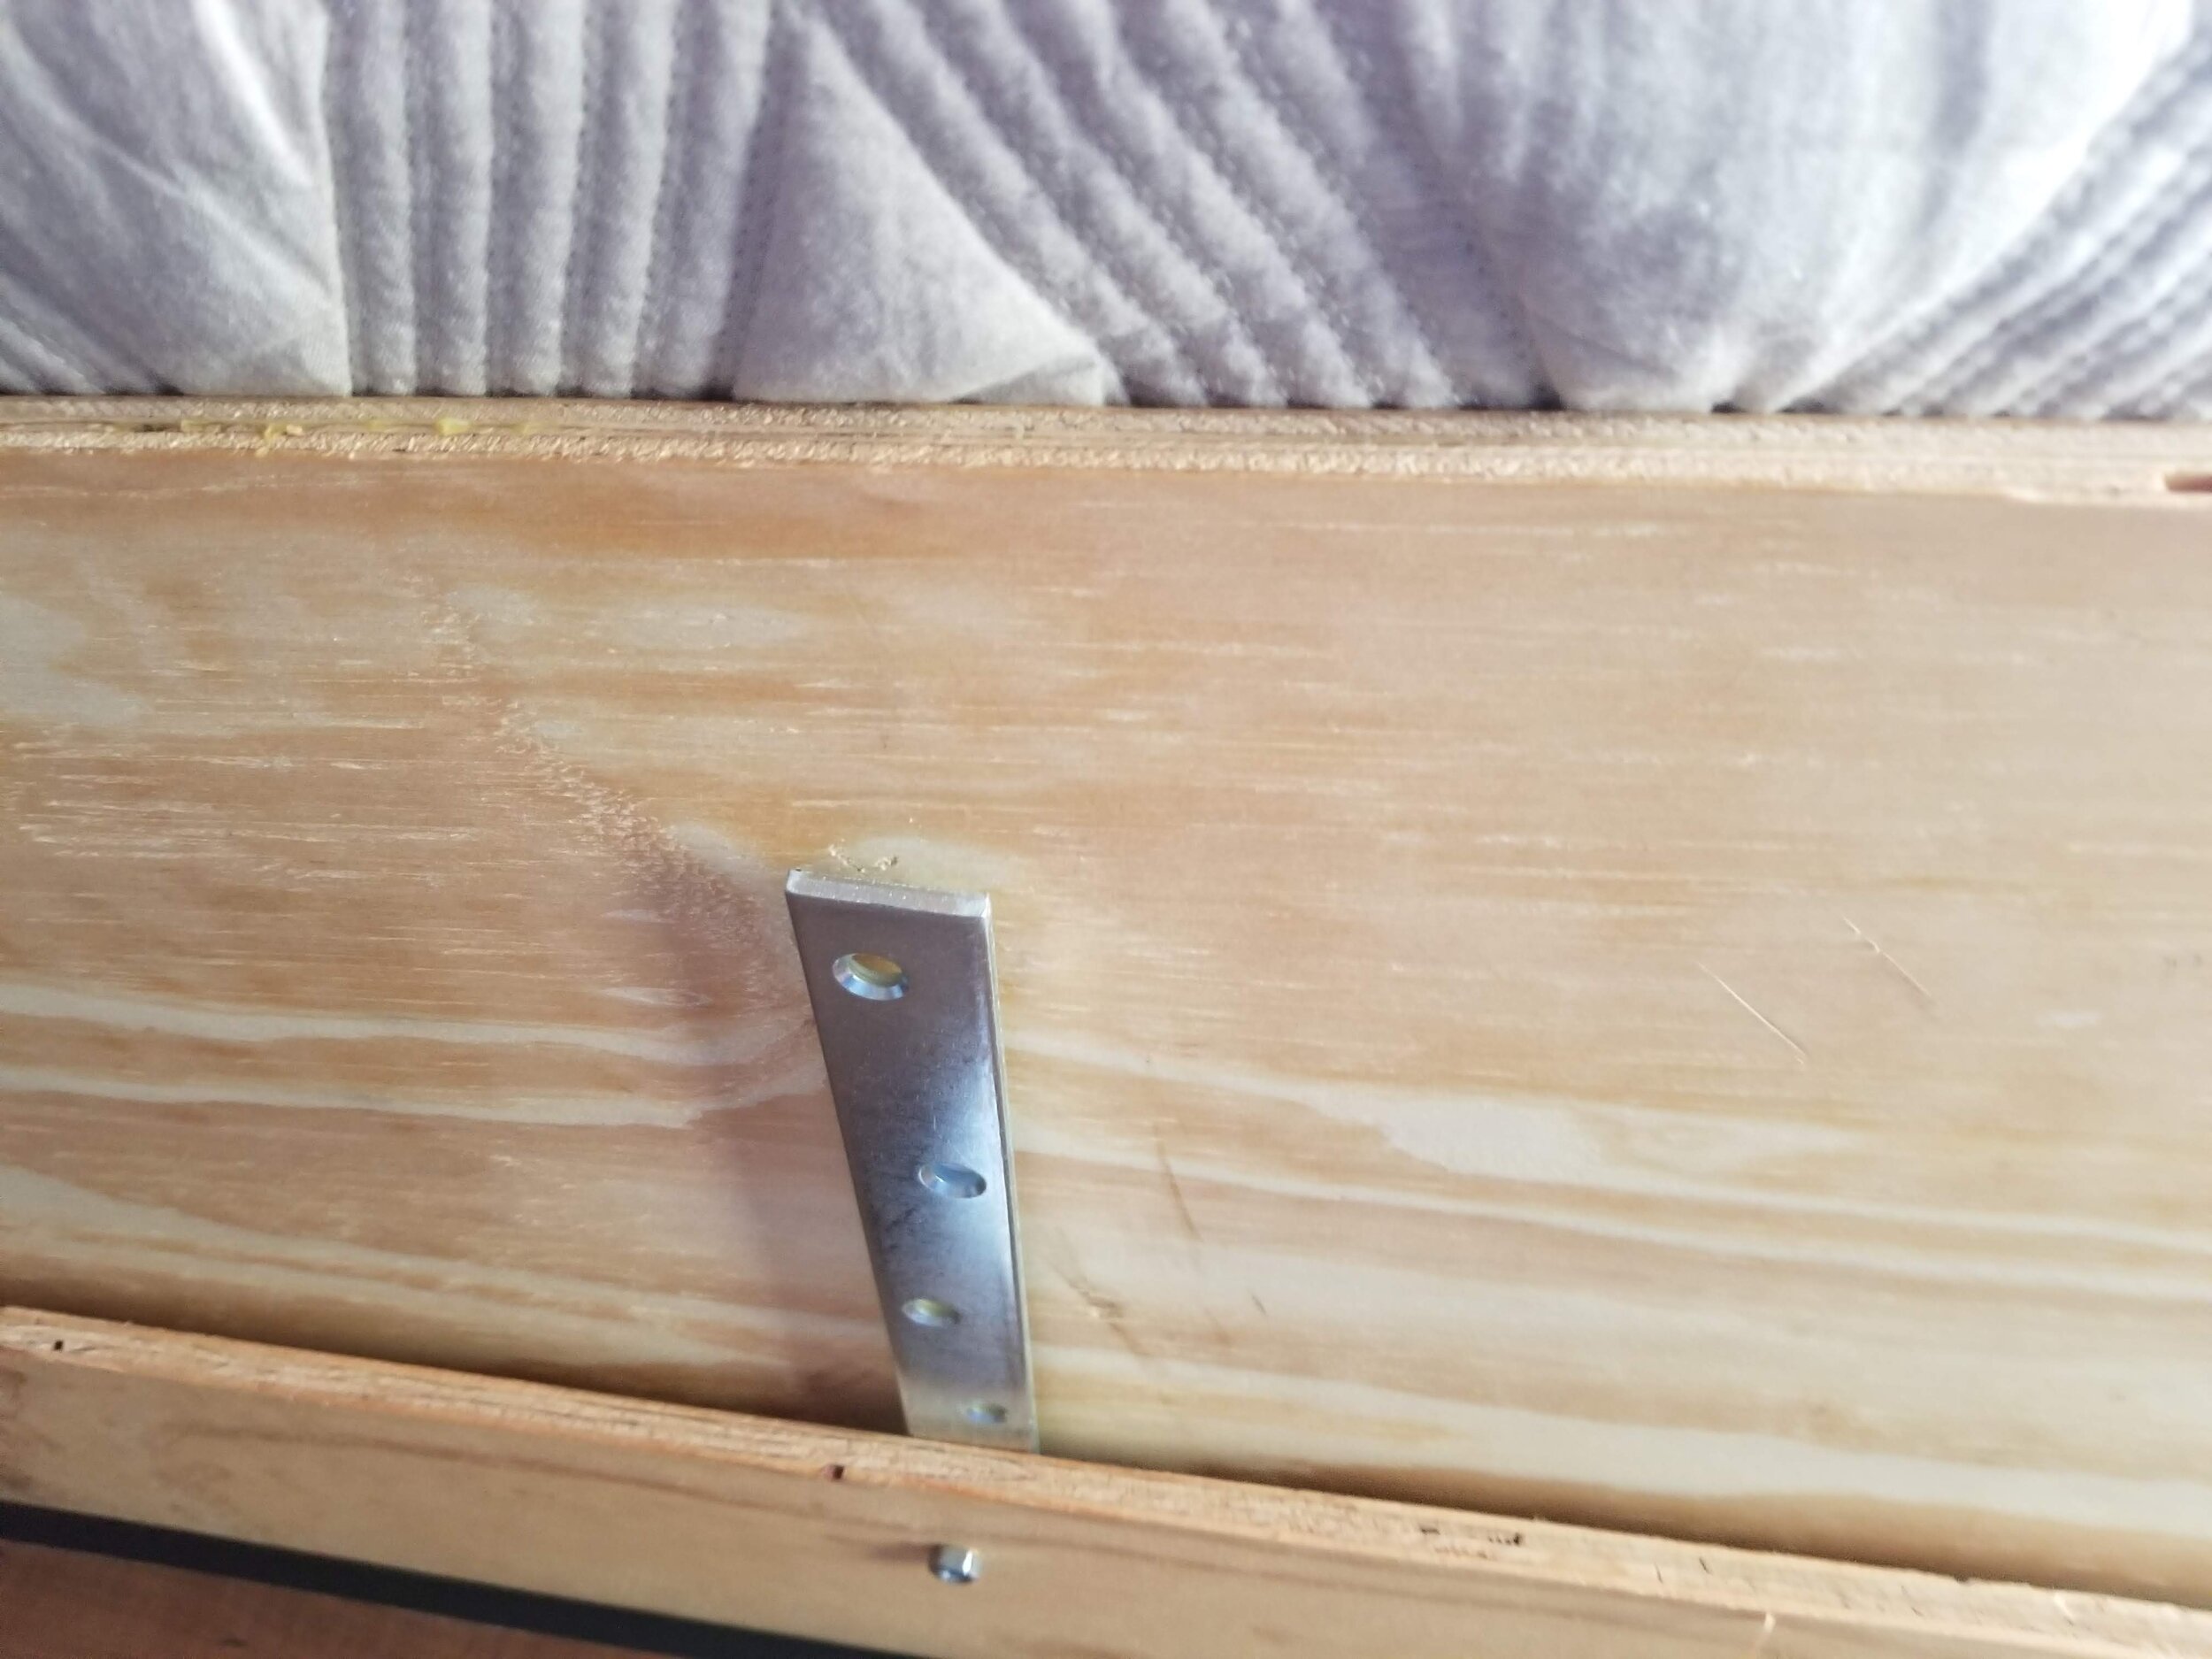
Installed 3 flat brackets with bolts to the existing plywood that covers the storage area under the bed. The brackets pivot out to support the added plywood piece when in use. These do not affect the function of the storage cover.
Strapping to wrap around mattress to allow for lifting to change between day/travel position. I used 2 different kinds of strapping simply because it is what I had in my sewing supplies.
The bed will still lift up to access storage. which is why the extra plywood support is not too wide, it will allow the end of the bed to lift without interfering with the existing hinge. The existing storage door brackets (struts) should be replaced for stronger hold. Since we have the double bunks we tend to use those for storage vs under the bed.
At the front of the RV where we put our pillows there is a 5" wide ledge. Key was making sure the mattress was same height as the ledge to be able to utilize that 5” as pillow support and give more length on the bed.. This design gives us 77" length (72" mattress + 5" ledge). For us we are both under 5' 8" in height, we can put our pillows at the front of the RV vs the design to have heads by headboard area as they intended. Makes for 80” wide with 72+5 or 77 for length for our use. For us climbing down off the end is easier than rolling over one another. However, most people would probably use the bed in the intended position head/feet side to side in the RV with heads at the headboard.
For the straps I tied around the corners of the mattress at the isle side. From the corner straps I ran a strap underneath the mattress up to the top/head of the bed for the leverage. Then attached another strap to these along the isle/end of the mattress to help hold the corner loops on and give me something to grab to pull the mattress.
To bring in the slider the mattress needs to be in the "day/transport position”. I grab the straps that are usually tucked at the head of the bed front of RV (they are showing in the picture for example) and pull up on those as I push in the mattress and add on plywood piece from the isle towards the front of the RV. I do put a pillow between my leg and plywood to keep from hurting my leg. This mattress is 90lb so needs a good push once you pull it up over the ledge. This will lift the mattress above the little ledge at the front of the RV and shorten the length in the isle to allow the slider to come in. You can see from the picture the dinette is in and it fits just fine. Then I can just tuck the strap back between the small ledge and the mattress. Bonus: I find the fitted sheet goes on easier in this position since the corners are up. I find I can still easily pull the tucked straps on the top or grab the bottom strap to pull flat with sheets/blankets on.
The bed was always tall but with the 10” mattress we use a folding one step to get up to the bed. It just makes it a little easier. The step folds and stores for travel.
To put into night mode with the slider out, I pull on the strap that is at the end of the bed at the isle side and pull it off the ledge and flat. Pull out the add on piece of plywood over the brackets.
It’s about a minute process to put into “Day/Travel Position” and less to make into “Sleep position”.
I cut a 1/2” thick piece of plywood to the size of 21” by 65”. and trimmed the corner by the door at an angle. That way if the bed is in sleep mode you don’t hit the corner of the wood since it will stick into the doorway area a few inches.
This piece is free floating to allow it to slide in and out. I do have a small strap on it on the isle side to make it easier to grab and pull into place for night position.
New simple version: 3 brackets bolted to the original plywood base. These pivot easily. The added plywood support slides out over these brackets. The brackets are sufficient for us to keep the added plywood from tipping when getting in and out of the bed. If we were laying the other direction, we would likely have kept the original supports for more stability.
Retired first version modification, supports 1x4 boards for support (stain if you want, I used stain I had in the garage, close enough)
2 bookshelf supports (no longer than 12”)
removable hook and loop (velcro) to hold the supports in place (I remove for traveling since everything shakes on the move)
Below is the full support braces first design.

For the supports I used 1x4 pieces of lumber so they will fit between the drawers and still allow the drawers to operate. My initial model was just support from the floor and I would hit my toes, so I had to redesign. I attached simple shelf brackets 12” length to the upright boards that support the plywood extension. I stained the wood with some stain I had so not a perfect match but blends. These brackets are attached to the cabinetry using removable hook and loop tape. These brackets do not have anything attaching them on the top to the moveable plywood. It simply provides a base for the extra plywood to support the mattress. I remove the brackets for travel but leave if just pulling the slide in or using in day mode. In our unit the brackets do not disrupt the slider operation.

